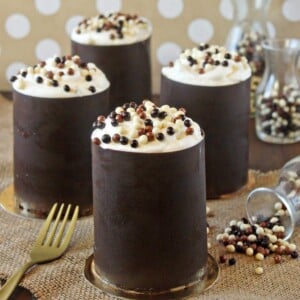
Banana Bread Tiramisu has a hint of dulce de leche in the bread and layers of soft, sweet mascarpone cheese and caramelized bananas that really boost the banana flavor. Plus, the entire dessert is wrapped in an edible chocolate wrapper!

Chocolate Wrapped Banana Bread Tiramisu
I love banana bread. I love tiramisu. I love making recipes with a bajillion components (although I kind of hating writing out those long recipes…sigh). I really love putting on my fancy pants and going to town with frou-frou decorations. So obviously, these banana bread tiramisus in edible chocolate wrappers are basically my own culinary Mr. Darcy. (Colin Firth version, natch.)
And yes, you read that right. Banana bread tiramisu. These gorgeous desserts have:
1. Homemade banana bread, soaked in…
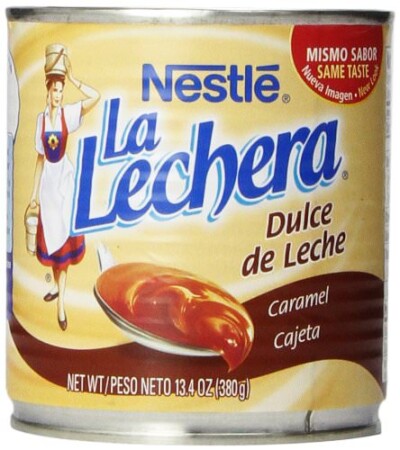
2. Dulce de leche soaking syrup, topped with…
3. Caramelized bananas, covered with….
4. Mascarpone cream, finished with…
5. Whipped cream, chocolate pearls, and an edible chocolate shell around the entire thing!
Table of Contents

Did somebody say hubba hubba?
They’re not for the faint of heart, but they are for all lovers of banana bread, creamy dessert enthusiasts, fearless culinary adventurers, aspiring pastry super stars, and/or those with a lot of time on their hands who prefer cooking projects to sensible hobbies like knitting. (I hear that.)

The credit for this idea goes to Dominique Ansel. I mentioned last month that I stopped by his bakery when I was in New York. While there, I saw that he sold a banana bread tiramisu in an edible chocolate cup. I was too busy stuffing my face with five other desserts to try his tiramisu that day, so considering that I have no idea what his actually tastes like, this is not intended to be a copycat recipe. But he is definitely the inspiration behind this, and I would love to try his version some day!

What You’ll Need
As a traditional tiramisu lover, I wasn’t sure what to expect from a banana bread version. Banana bread is already soft, so would the finished dessert be too gooey? Unpleasantly gummy? Weirdly moist? Honestly, it was fantastic. It’s like a gourmet banana cake on steroids. The hint of dulce de leche in the bread is a wonderful addition, and I’m now convinced that all banana bread should be served with a side of mascarpone, because the soft, sweet cheese is the perfect accompaniment to the bread. The caramelized bananas really boost the banana flavor and add a deeper sweetness and just a hint of (optional) rum.

Make-Ahead Information
If you make these tiramisus, you will probably want to spread the process out over the course of several days, both for sanity and for funsies. The banana bread and dulce de leche can be made one day, the desserts can be assembled either the next day or that evening, and then left to rest for several hours to firm up. They can then be wrapped in chocolate and finished once they’re fully set.
Make-Ahead Tip
The only caution I have is regarding the caramelized bananas. Jason & I both loved them in the tiramisu, but I think if you’re planning on making the dessert several days in advance (since tiramisu keeps so well, it’s an excellent make-ahead dish) you might consider omitting them from the recipe. I liked the bananas at first, but several days later I found them a bit too soft for my taste. So take that into account if you expect to be eating these for days after assembly.

How to Make the Chocolate Wrappers
Let’s talk about the chocolate wrapper! It’s not too hard to do, but you will need some special equipment, specifically acetate cake collars. I always try to provide alternatives to any specialty tools, because I know many home cooks don’t have access to or aren’t interested in buying tools just for one dish….but in this case, there really isn’t a great substitute for the acetate. You can definitely make these tiramisus in glass cups (like this!) instead of wrapped in chocolate, and I provide instructions for that below. But if you want the full chocolate shell experience, hop on Amazon or head to your local cake supply store and pick up some 4” acetate strips. It makes chocolate work like this a breeze!
The pictures make it pretty self-explanatory, and I hope you can see how non-intimidating the process actually is. The tiramisus are formed in acetate rounds, then the acetate is cut away, leaving a sad naked little tiramisu. Then, chocolate candy coating or tempered chocolate is spread on a strip of acetate and wrapped around the dessert before being taped together in back. Once it’s set, you just peel the acetate strip off and you’re left with a shiny, perfectly formed chocolate shell enclosing your dessert! They probably won’t all be perfect on your first try, but the more you practice the better you’ll get…and even the occasional crack or scratch won’t make it any less impressive.

Variations
I hope you enjoy these as much as we did! If you’re not up for the full enchilada, try assembling them in a 9×13 pan, making only a few of the components from scratch, or forgetting the tiramisu entirely and using the chocolate-wrapping technique on another dessert. I really just want to encourage you to play, to have fun with your food, and to try new things in the kitchen. Oh, and to eat dessert regularly. But you probably already knew that.

❤️ More Creamy Desserts You’ll Love
Banana Bread Tiramisu
Ingredients
For the Banana Bread:
- 4 large eggs, at room temperature
- 14 oz granulated sugar, (2 cups)
- 2.5 oz brown sugar, (⅓ cup), packed
- 24 oz mashed ripe bananas, (3 cups), from about 6 bananas
- 8 oz vegetable oil, (1 cup), or liquid coconut oil
- 2 tsp vanilla extract
- 2 oz plain Greek yogurt, (1/4 cup), or sour cream, full-fat
- 13.75 oz all-purpose flour, (3 ¼ cups)
- 2 tsp baking soda
- 2 tsp ground cinnamon
- 1/2 tsp salt
For the Dulce de Leche Soaking Syrup:
- 14 oz dulce de leche , or sweetened condensed milk
- 1/4 cup milk, any percentage
For the Caramelized Bananas:
- 2 tbsp unsalted butter
- 1/4 cup brown sugar
- 1 tbsp rum, can substitute water or orange juice
- 1 tsp vanilla extract
- 1/4 tsp ground cinnamon
- 4 large large bananas, or 5 medium bananas
For the Mascarpone Cream:
- 6 large egg yolks, at room temperature
- 7 oz granulated sugar, (1 cup)
- 1 lb mascarpone cheese
- ¼ tsp salt
- 2 tsp vanilla extract
- 3/4 cup heavy cream
To Assemble:
- 1 1/2 cups heavy cream
- 1/2 cup powdered sugar
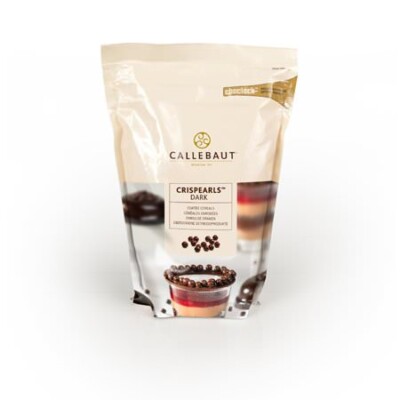
- Chocolate pearls , or other chocolate decorations, optional
For the Optional Chocolate Shell:
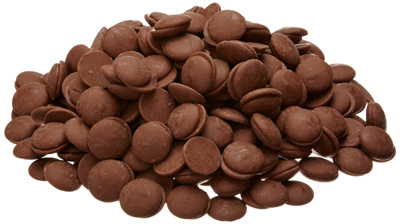
- 1 lb chocolate candy coating melts, or tempered chocolate, see here for tempering instructions. I don't recommend using plain chocolate that has been melted but not tempered.
- Acetate cake collar strips, 4″ high
Instructions
To Make the Banana Bread:
- Preheat the oven to 350 F and spray two 9×5-inch loaf pans with nonstick cooking spray. Combine the eggs and both sugars in the bowl of a large stand mixer fitted with the paddle attachment. Beat them on medium speed until well-mixed, then turn the speed to low, add the mashed bananas and mix them in. Finally, mix in the oil, vanilla extract, and Greek yogurt.
- In a separate bowl, whisk together the flour, baking soda, cinnamon, and salt. With the mixer running on low, add the dry ingredients and mix until just a few streaks of flour remain. Stop the mixer and finish mixing by hand, scraping the bottom and sides of the bowl well with a spatula until everything is well-incorporated.
- Divide the batter evenly between the two loaf pans (if you want to weigh it out, there should be 36 oz in each pan.) Bake the loaves at 350 F for 50-60 minutes, until a toothpick inserted into the center comes out clean. If the tops are getting too dark during baking, cover them loosely with foil during the final baking stages.
- Cool the loaves on a wire rack for 20 minutes, then turn them out of the pans and let them cool completely.
To Make the Dulce de Leche Soaking Syrup:
- If you are using store-bought dulce de leche, pour it into a bowl and whisk in the milk, a spoonful at a time, until you have a thin consistency similar to heavy cream.
- If you will be making the dulce de leche yourself, submerge a can of sweetened condensed milk in a pan of water and bring the water to a simmer. Simmer the can for 3 hours on the stovetop, adding more water if necessary so that the can is always covered. After 3 hours take the can out of the water, cool the can completely, then open it and proceed as above.
To Make the Caramelized Bananas:
- Slice the bananas in half, then cut the halves into 2-3 pieces lengthwise. So as not to overcrowd the bananas while cooking, make them in two batches. Place a large saucepan over medium-high heat, and once hot, melt half of the butter in the pan. Add half of the sugar, rum, vanilla extract, and cinnamon, and stir until you have a bubbling syrup. Add half of the banana slices and cook them, undisturbed, for 30 seconds. Carefully turn the bananas over and cook for an additional 60 seconds. Remove the bananas from the pan and repeat the produced with the second batch of bananas (no need to clean the pan in between!).
To Make the Mascarpone Cream:
- Place the egg yolks and sugar in the large bowl of a stand mixer fitted with a whisk attachment. Beat the yolks and sugar together on medium-high speed until they are very thick and pale, about 2-3 minutes. When you stop the mixer and lift up the whisk, the yolks should slowly drip from the whisk in a thick ribbon.
- Add the mascarpone cheese, salt, and vanilla extract, and beat on medium-low until the cheese is incorporated and the mixture is free of lumps. Don’t overbeat, or beat too quickly, since mascarpone is prone to breaking if it’s overworked!
- Transfer the mascarpone cheese to another bowl, and in the same mixing bowl—no need to clean it—place the remaining ¾ cup heavy cream. Whip the cream to firm peaks, then gently fold it into the cheese in several batches.
To Assemble in Glass Cups:
- The easiest way to make these desserts is to assemble them in six 10-oz dishes or cups. Slice the banana bread into 1/2-inch slices, then use a round cutter to cut the slices into circles the width of the dishes you’ll be using. If your dishes are wider than the slices, you can press two slices together to cut out the circles, or just use cubes of banana bread for a less precise look.
- Hold a circle of banana bread in one hand, and gently spoon some of the dulce de leche soaking syrup over it. The banana bread will be too delicate to really dip in the dulce de leche, so you’re just going for a quick soaking while you hold it. Place a layer of banana bread into the bottom of your cup, then repeat until all of the dishes have a first layer of banana bread.
- Top each piece of banana bread with 1-2 pieces of caramelized bananas, trimming them if necessary so they fit. Spoon a thick layer of the mascarpone cream over the bananas—you may find that it’s easier to put the cream into a pastry bag with a round tip, or a plastic bag with the corner snipped off. Once all of the bananas have a layer of mascarpone, repeat the layers, adding more soaked banana bread, caramelized bananas, and mascarpone, until you have made 3 layers of each. Make sure that you end with a layer of mascarpone cheese.
- Whip the cream and powdered sugar together until you have stiff peaks. Finish the tiramisus with a big dollop of whipped cream and a scattering of chocolate pearls, sprinkles, or shavings. Refrigerate for at least 2 hours, then serve!
To Assemble in Chocolate Shells:
- If you want to assemble the tiramisus in edible chocolate shells, you will need 4″ tall acetate cake collars. Wind the acetate into a 3″ circle, tape it together, then place it on a cardboard round or small plate. Repeat until you have 6 acetate circles. This is what you will assemble your tiramisus in. Assemble the tiramisu as described above, but do not top them with whipped cream yet. After you have added the final layer of mascarpone to each one, refrigerate the tiramisus for at least 4 hours, so they will be firm.
- Measure the circumference of the tiramisus and cut six additional acetate strips that will fit all the way around the tiramisus. Using scissors, slice through the acetate collars that were around the tiramisus and remove them.
- Cover your work surface with parchment or waxed paper, and lay an acetate strip out on the paper. Melt the candy coating in a large microwave-safe bowl, or temper the chocolate. Spoon some of the melted chocolate onto the acetate in even intervals. Remember that it is going to be spread in a thin layer, so apply it sparingly. You can always add more later if you need to.
- Using an offset spatula, spread the chocolate in a thin layer over the entire acetate strip, so that all of the edges are covered. It’s okay if the chocolate goes past the edges. Allow the chocolate to sit for about 5 minutes, until it just begins to set around the edges but is not fully hard or brittle.
- Lift up the chocolate-covered strip of acetate and carefully place one edge against the side of the tiramisu, pressing the wet chocolate directly against the edge. Wrap it entirely around the tiramisu and press the ends together. Tape the outside of the acetate strip to secure it around the sides of the tiramisu. Place the dessert in the refrigerator to fully set the chocolate for at least 25 minutes. As you get more comfortable with the prodedure, you can do several at once instead of one at a time.
- Once the chocolate is firm, peel back the tape and carefully unwind the strip of acetate, peeling it off of the chocolate. Once all of the tiramisus are unwrapped, top them with whipped cream and chocolate pearls or other decorations.
Recipe Notes
Measuring Tips
Our recipes are developed using weight measurements, and we highly recommend using a kitchen scale for baking whenever possible. However, if you prefer to use cups, volume measurements are provided as well. PLEASE NOTE: the adage “8 oz = 1 cup” is NOT true when speaking about weight, so don’t be concerned if the measurements don’t fit this formula.
Want to learn more about baking measurements and conversion?


Hey you! : )
I made this for a work friend on his birthday. He said it was SO GOOD but he could not eat a bite or more of it because of his disheartening intolerance to dairy! Sigh.. : ) But apparently, it was devoured by all his teammates in less than a couple of minutes! Haha : )
I only made half this recipe and I was still able to fill up 2 of those aluminium loaf pans! The other colleagues I shared the other pan with also couldn’t stop raving about it. Additionally, I gave some to another friend of mine and she called it “divine” !
So, here’s thanking you SO MUCH for your wonderful recipe.
: D You’re a rockstar, Elizabeth!
Could you please tell me where you bought the 10 oz serving glasses? Thank you so much!
I originally got mine from Crater & Barrel but it was years ago. They always have nice glass dishes and chances are they’ll have some nice small trifle dishes that’ll work well for this!
I have a simple questions about the candy pearls. Did you purchase 3 different bags to get the multi colors or did you find a bag of mixed? Thank so much
Hi Donna, I bought the pearls at a local cake/candy supply store, and they sold them in mixed containers. They were probably mixed by the cake store, is my guess. Hope this helps!
Thank you for sharing these delicious recipes.
My pleasure, Carla! Thanks for visiting!
Unless I skip it but where is the recipe?
Hi Serens, the recipe is at the bottom of the post, after the pictures but before the comments. If you’re viewing on mobile, you can click the “Read More” button to see the full post. Let me know if you’re still having trouble!
Instead of the chocolate wraps, use balloons to make chocolate bowls. This would be easier and look just as nice.
This looks delicious!
I love that idea! Send some pics if you decide to try it. All the best!