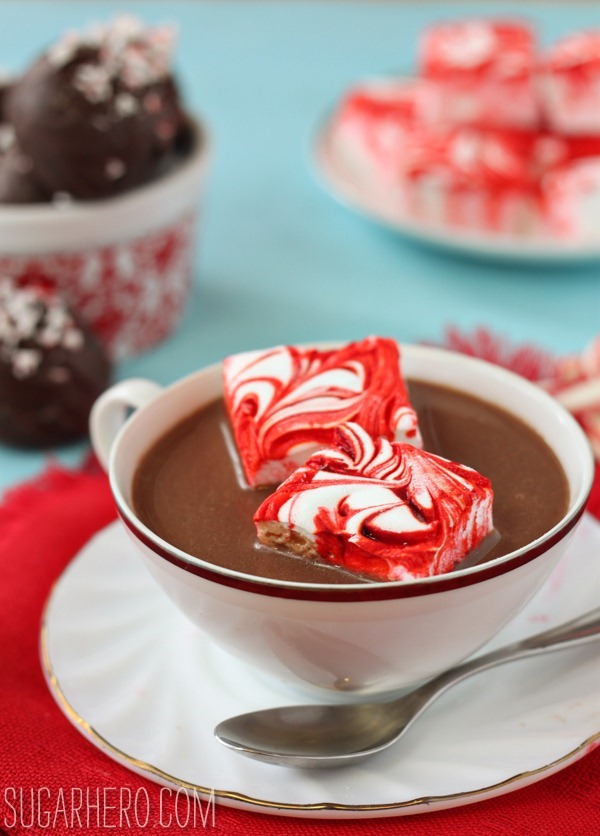
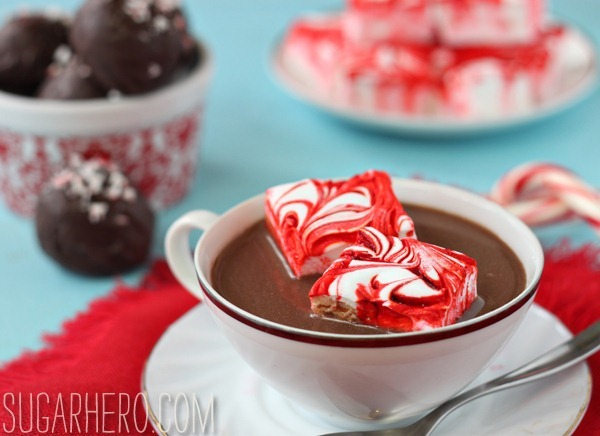
These Hot Chocolate Truffles and Peppermint Swirl Marshmallows have extra-large deliciousness melted with milk to produce a rich, creamy mug of hot chocolate.
I got it into my head to make homemade gifts for Christmas this year. I know. I KNOW. Busy people with babies zooming around their feet like caffeinated chihuahuas should give up any pretense of Martha Stewart-ism and just buy their loved ones pretty candles or something.
But I couldn’t help myself. I call it the Curse of Pinterest. After spending months scrolling past lovingly knitted scarves, beautiful jewelry, and gorgeous artwork, I somehow convinced myself that I am a handcrafting goddess, and nothing but the very best in homemade goodies would do for my nearest and dearest.
Unfortunately, it turns out that I don’t know how to sew. Or knit. Or paint watercolors. Or do any of the other Pinterestty things I’ve been considering. So after considering my strengths (baking) and weaknesses (see long list above) it was decided: edible gifts all around!
I may be a one-trick pony, but at least I’m a pony who comes bearing sweets.
Over the next few weeks I’ll be sharing a few different ideas for edible gifts. Today’s feature: Hot Chocolate Truffles and Peppermint Swirl Marshmallows.
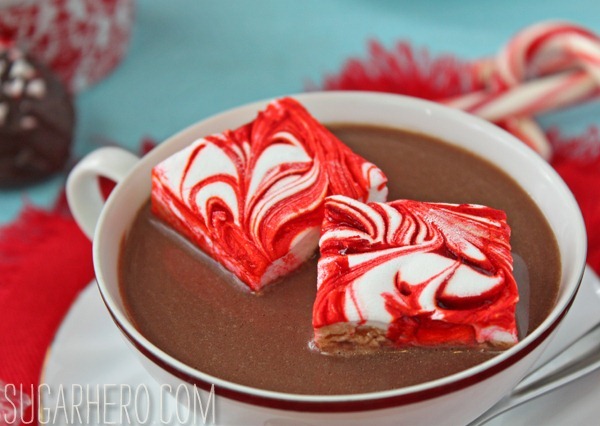
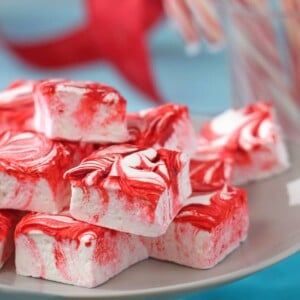
This festive marshmallow recipe is from my book, The Sweet Book of Candy Making. They’re good year-round (especially if you decorate them using different color schemes), but I think they’re extra-appropriate during the Christmas season. Soft and plush, refreshingly minty, they’re equally delicious eaten plain, dipped in chocolate, or dunked in a mug of hot chocolate.
[I must admit that I got a little carried away with the red swirls. If you make these, I recommend going a little lighter with the food coloring, so that the white stands out a little more in the swirled pattern.]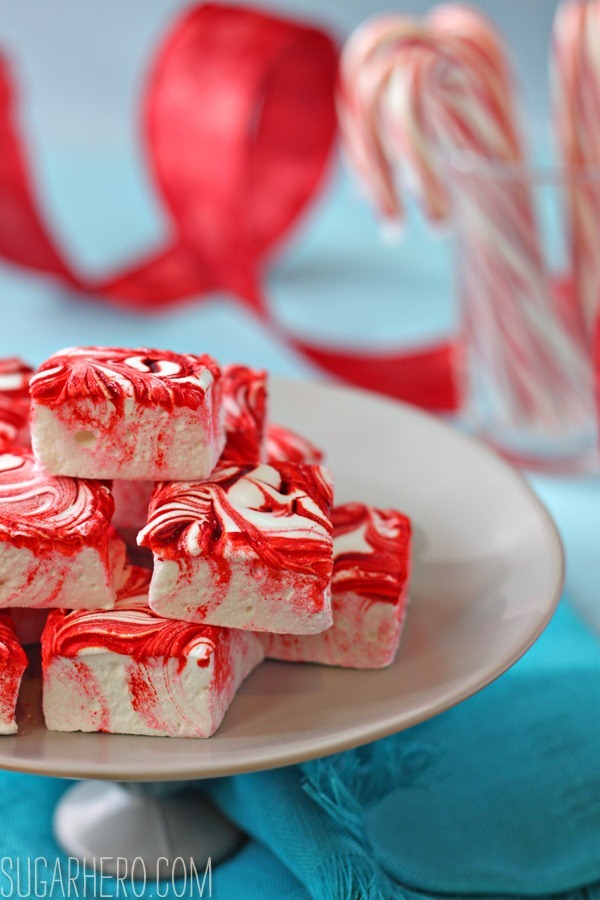
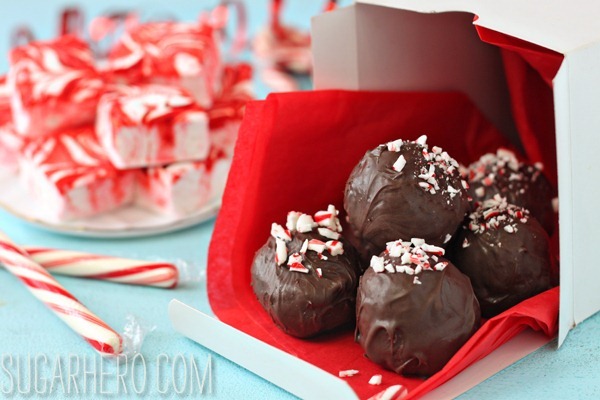
Hot Chocolate Truffles are extra-large truffles that are melted with milk to produce a rich, creamy mug of hot chocolate. The only ingredients are chocolate and cream (and maybe a pinch of crushed candy canes for decoration) so the resulting drink has an intense chocolate flavor and a lovely thick texture. It’s a sipping chocolate, one to be savored slowly while the fluffy peppermint marshmallow slowly melts on top.
These two candies make the perfect edible gift for the sweet lover in your life. Package them with a cute mug and a quick note explaining how to prepare the hot chocolate, then sit back and prepare to receive hugs of gratitude.
More Christmas Recipes
- Peppermint Hot Chocolate
- Champagne White Chocolate Truffles Recipe
- Slow Cooker Hot Chocolate
- Cranberry S’mores
- Raspberry White Hot Chocolate
- Pumpkin Spice Hot Chocolate Truffles
- Cherry Hot Chocolate
- Orange Hot Chocolate
Chocolate Truffle Peppermint Crunch Cookies
Frozen Hot Chocolate
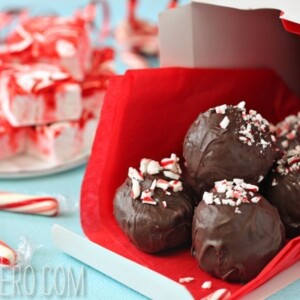
Hot Chocolate Truffles
Ingredients
- 18 oz semi-sweet chocolate, (3 cups) chopped, divided use, do not use chocolate chips
- 4 fl oz heavy cream, (1/2 cup)
- crushed candy canes, for decorating, optional
- unsweetened cocoa powder, for rolling the truffles
Instructions
- Chop the semi-sweet chocolate until it is in small, even pieces. Separate out 12 oz (about 2 cups) and place it in a medium heat-safe bowl. Set aside the remaining 6 oz (1 cup) for now.
- Pour the cream into a small saucepan and place it over medium heat. Heat the cream until it simmers, but do not let it come to a full boil.
- Pour the hot cream over the 12 oz chopped chocolate in the bowl. Let it sit for one minute, so that the cream softens the chocolate. Use a whisk to gently mix the cream and chocolate together. The mixture will be thick by the end. If some of the chocolate pieces remain unmelted, microwave the bowl in 10 second increments, stirring after every 10 seconds, until the chocolate is completely melted and the mixture is smooth and shiny.
- Press a layer of cling wrap on top of the chocolate, and refrigerate it until it is firm enough to scoop, about 1 hour. If it is left too long in the refrigerator and is too hard, let it sit and soften at room temperature.
- Use a cookie scoop or a large spoon to shape the chocolate into large balls, about 1 1/2 inches in diameter (about 1.5 oz each, if you have a kitchen scale.) Roll them between your palms to make them round, dusting your palms if necessary with cocoa powder to prevent sticking. You should get 10 hot chocolate truffles from this recipe. If you have the time, let the truffles sit out at room temperature in a cool room overnight to form a “skin.” This makes them much easier to dip and reduces the chance of the chocolate coating cracking. If you don’t have the time, refrigerate the truffles until they are firm enough to dip.
- Melt the remaining 6 oz (1 cup) of chocolate in the microwave. (Since the hot chocolate truffles will be stored in the refrigerator, you don’t need to worry about tempering the chocolate.) Test the temperature of the melted chocolate to make sure it’s not too hot and then pour a large spoonful of chocolate in your palm. Place a truffle in the puddle of chocolate and use your other hand to turn it around in the chocolate until it’s evenly coated. Tip the truffle from your palm onto a foil-covered baking sheet. This method gives the truffle a very thin coating of chocolate and a charming rustic appearance.
- If desired, sprinkle a pinch of crushed candy canes on top while the chocolate is still wet and then allow the truffles to set on the counter.
- Once the chocolate is set, store the truffles in an airtight container in the refrigerator for up to a month.
Recipe Notes
Measuring Tips
Our recipes are developed using weight measurements, and we highly recommend using a kitchen scale for baking whenever possible. However, if you prefer to use cups, volume measurements are provided as well. PLEASE NOTE: the adage “8 oz = 1 cup” is NOT true when speaking about weight, so don’t be concerned if the measurements don’t fit this formula.
Want to learn more about baking measurements and conversion?
Nutrition
Peppermint Swirl Marshmallows
Ingredients
- 2.5 fl oz large egg whites, approximately the whites from 2 large eggs, at room temperature
- 8 fl oz cold water, (1 cup)
- .75 oz unflavored powdered gelatin, or 3 envelopes
- 14 oz granulated sugar, (2 cups)
- 5.5 fl oz light corn syrup, (1/2 cup)
- 1/4 tsp salt
- ½-1 tsp peppermint extract
- red gel food coloring
- 4 oz powdered sugar, (1 cup)
Instructions
- Line a 9×13-inch baking pan with aluminum foil or plastic wrap, and spray the foil or plastic wrap with nonstick cooking spray.
- Place the room temperature egg whites in the bowl of a large stand mixer fitted with a whisk attachment.
- Pour 4 fl oz (1/2 cup) of the cold water in a small bowl, and whisk in the gelatin. Set the bowl aside to let the gelatin “bloom,” or absorb the water.
- Pour the remaining 4 fl oz (1/2 cup) of water in a medium heavy-bottomed saucepan, and stir in the granulated sugar, the light corn syrup, and the salt. Place the pan over medium-high heat and continue to stir until the sugar dissolves. Brush down the sides of the pan with a wet pastry brush to remove any stray sugar crystals. Insert a candy thermometer.
- Cook the sugar syrup, without stirring, until the thermometer reaches 260° Fahrenheit. This will take 10-15 minutes, so while you’re waiting for the sugar to cook, microwave the gelatin bowl for about 20 seconds, until the gelatin liquefies.
- When the sugar syrup reaches 245° Fahrenheit, begin beating the egg whites on medium speed. The egg whites should be well-beaten and be able to hold firm peaks at approximately the same time the sugar syrup reaches 260° Fahrenheit.
- When the sugar syrup is at 260°, remove the pan from the heat and carefully whisk in the liquid gelatin mixture. It will bubble up and steam a bit, so watch your hands during this step.
- The hot sugar syrup now needs to be added to the egg whites. If your saucepan does not have a spout, pour the syrup into a large mixing cup or pitcher with a spout, to give you more control over the process. Turn the mixer to low, and with the mixer running, slowly stream the hot sugar syrup into the beaten egg whites. Try to pour the syrup close to the sides of the bowl, so it doesn’t hit the whisk and splatter everywhere.
- Once all of the syrup is added to the whites, gradually increase the speed of the mixer until it is running on medium-high speed. Whip the marshmallow until it is very thick, shiny, and opaque, about 8-10 minutes depending on your mixer. When you lift the whisk from the marshmallow, it should slowly stream from the whisk in a thick ribbon. Add 1/2 tsp of peppermint extract and mix for 20 seconds to incorporate it. Taste the marshmallow, and if you would like a stronger mint flavor, mix in an additional 1/2 tsp.
- Pour the marshmallow into the prepared pan and smooth it into an even layer. Drizzle red food coloring over the top of the marshmallow in a random pattern. Drag a toothpick through the marshmallow, swirling the food coloring on top. Stop before the colors start to bleed, while you still have distinct red and white swirls. Let the marshmallow sit and rest, undisturbed, at room temperature until it is completely set, about 8 hours.
- When you’re ready to cut the marshmallow, dust your work surface with powdered sugar, and sprinkle a layer of powdered sugar on top of the marshmallow. Flip the marshmallow face-down on the work surface and peel the foil or cling wrap off the back. Dust a large chef’s knife with powdered sugar and cut the marshmallow into long thin strips, cleaning the knife frequently as it gets sticky. Cut the strips of marshmallow into small squares. Toss the marshmallow squares in powdered sugar to prevent them from sticking together. Store the marshmallows in an airtight container at room temperature for up to 2 weeks.
Recipe Notes
Measuring Tips
Our recipes are developed using weight measurements, and we highly recommend using a kitchen scale for baking whenever possible. However, if you prefer to use cups, volume measurements are provided as well. PLEASE NOTE: the adage “8 oz = 1 cup” is NOT true when speaking about weight, so don’t be concerned if the measurements don’t fit this formula.
Want to learn more about baking measurements and conversion?
Nutrition



You make me giggle. Thank goodness you got permission from that Elizabeth LaBau!
Right?! She’s pretty possessive so it’s a small miracle she said okay.
Actually, I DO have to ask the publisher every time–fortunately they said yes! 🙂
These truffles and marshmallows look amazing!
These are so beautiful !
ratedkb.wordpress.com
I love the marshmallows, the swirls are such a great idea! Do you think you could swirl in some mincemeat into the marshmallows?
This is the perfect fun Christmas gift for my nieces and nephews who already have all the toys they need! Love it!